Knowledge Base
-
Microsoft Teams
- Adding pupils and teachers into an existing class - Teams
- Attending and running meetings - Teams
- Basic Intro to Teams in Microsoft Office 365
- Creating a classroom - Teams
- Creating separate lessons within a class - Teams
- Disable chat within a Channel - Teams
- Disable Pupils From Creating a Team - Teams
- Disable Pupils Private Chat – Teams
- Disable Pupils Text Chat During Meetings - Teams
- GDPR Breaches - email CC and BCC
- Prevent meeting attendees from 'unmuting' - Teams
- Running assemblies - Teams
- Scheduling lessons - Teams
- Signing in to Microsoft Teams
- Stop Pupils From Kicking Others - Teams
- Show all articles ( 12 ) Collapse Articles
-
Google Classroom
- Ending a lesson - Google Classroom
- GDPR Breaches - email CC and BCC
- How to join Meets - Google Classroom
- Leaving a comment on more than one piece of work - Google Classroom
- Playing audio in a Meet when presenting - Google Classroom
- Prevent pupils joining lessons early - Google Classroom
- Recording a Meet - Google Classroom
- Resetting a classroom meet link - Google Classroom
- Running assemblies - Google Classroom
- Scheduling lessons - Google Classroom
- Sharing recorded files with a classroom - Google Classroom
- Sharing scheduled lessons in classroom - Google Classroom
- Using a Meet link for meetings - Google Classroom
- Show all articles ( 10 ) Collapse Articles
-
LGfL
- Accessing a Shared Mailbox in LGfL StaffMail
- Connecting laptop to school network using AnyConnect pre-boot
- GDPR Breaches - email CC and BCC
- How to opt in/out of LGfL mail notifications
- How to Register for an LGfL Soft OTP
- Logging in to LGfL services using Soft OTP through Microsoft Authenticator
- No file transfer in Freedom2Roam
- Remote access using Freedom2Roam from LGfL & NGfL
- Send Encrypted Files to non LGfL Users using USO-FX2
- Sending files securely – LGfL USO-FX2
- Show all articles ( 7 ) Collapse Articles
-
Helpful Tips
- DfE Portal - Device Password Extraction
- GDPR considerations before web meetings
- Getting Remote Support with Quick Assist
- Getting the best out of Google
- How to enable your microphone from your device properties
- How to find your computer name
- How to log on as a local user
- How to quickly insert symbols into documents
- How to raise an ICT support case
- Logging ICT Support Issues – Helpdesk tips
- Quick test to see if your webcam and microphone are working
- Quickly lock your computer when leaving your desk
- Running an Internet Speed Test
- Setting up a school Twitter account
- Useful Keyboard Shortcuts
- Show all articles ( 12 ) Collapse Articles
-
Inspire VoIP
-
Imaging
- Articles coming soon
Getting Remote Support with Quick Assist
Created On
Last Updated On
byAndy Badger
Print
0 out Of 5 Stars
| 5 Stars | 0% | |
| 4 Stars | 0% | |
| 3 Stars | 0% | |
| 2 Stars | 0% | |
| 1 Stars | 0% |
Quick Assist is an application that comes pre-installed in Windows 10 from version 1607 onwards. To allow a technician to remotely view/control your Windows computer;
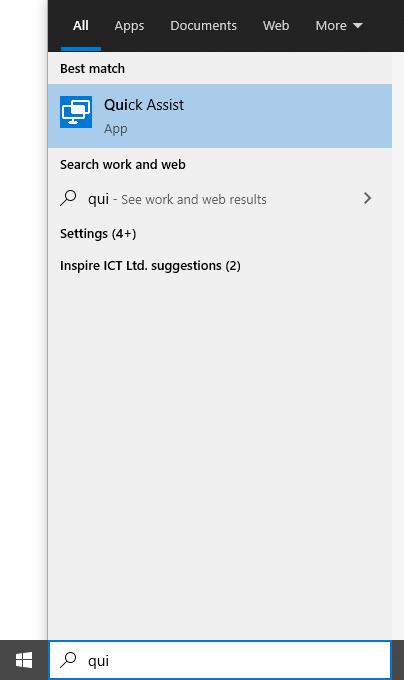
- Launch the Quick Assist tool. Click the Start button, and you’ll find that it’s listed under the Windows Accessories folder, or you can type Quick Assist into the Windows Search box next to the Start menu.

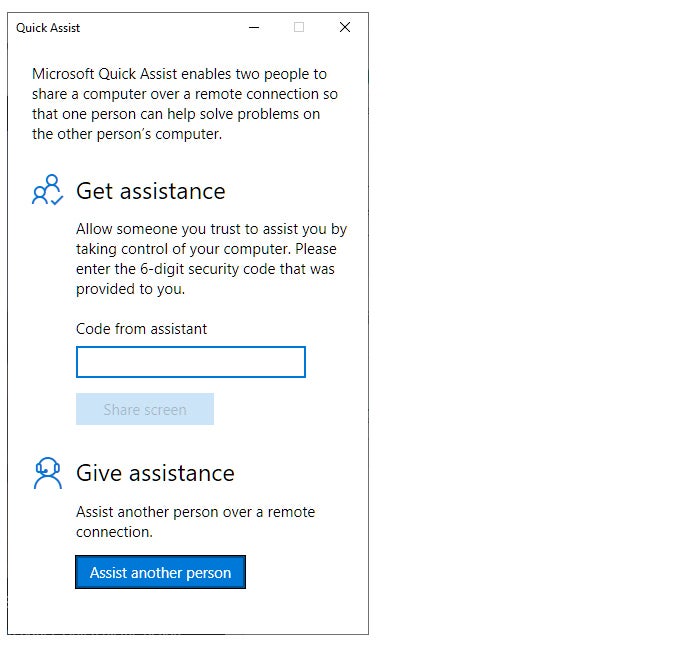
- Under “Get assistance,” enter the 6-digit security code given to you by the helpdesk technician and click the Share screen button.

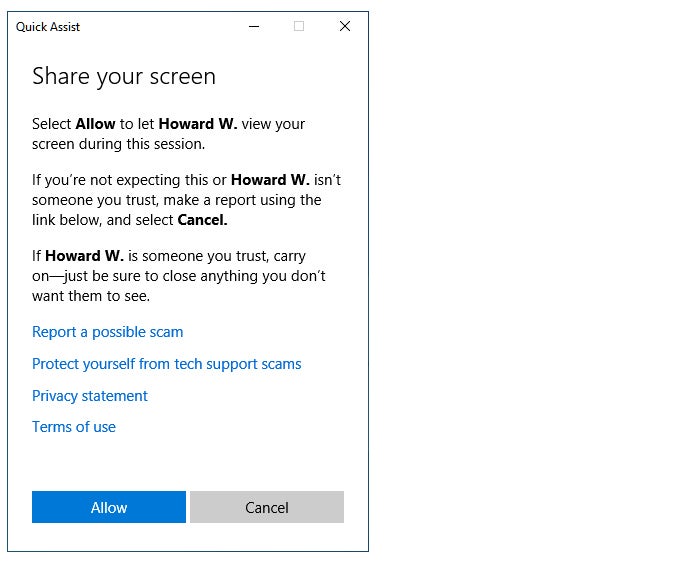
- Once the technician initiates the session, click on the Allow button, granting permission for the technician to access your computer.

Was this article helpful?
0 out Of 5 Stars
| 5 Stars | 0% | |
| 4 Stars | 0% | |
| 3 Stars | 0% | |
| 2 Stars | 0% | |
| 1 Stars | 0% |


